A passion for silversmithing

STERLING SILVER : Noun, meaning silver of 92 and a quarter percent purity.....

Sunday 21 August 2011

Pretty rings...

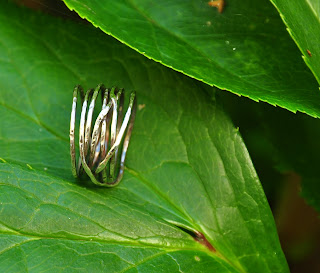
Am having fun with .8mm sterling silver round wire. Winding it round and round the ring mandrel, in a hotch potch way, then soldering the end to the beginning. Hammering it and dipping it in liver of sulphur and polishing it to a high shine.


So pleased with the results. I have been looking for a ring like this for ages for myself. Absolutely love it and will be wearing this every day.


I have also finally managed to make a reasonably decent bezel set ring. First attempts were not very good, but this one is OK. I used a small 6mm moonstone (one of two - the other I accidentally lost down the plughole - don't ask). I used 3mm bezel strip, 0.4mm silver sheet for the base, and 1.5mm round wire for the ring. Pretty fiddly to burnish as SO small, but very pretty.


And two delicate rings, one with a hand sawn heart shape

and one with a flower, again hand sawn.

The heart and flower were domed and polished and soldered to a ring made of 1.5mm round wire which I flattened in my rolling mill. I managed to make some silver balls using my scrap silver - such fun to make and very quick. I ground a small hole in my charcoal block and put a small scrap of silver in the hole. Heated it until it melted into a ball and drooped it in to quench. Used some in the pretty flower ring.

Am just about confident enough to open my new Etsy shop 'Triploi and Rouge'. I have played around with photos and made the banner for the shop......


Wedding ring finally finished, and a new hand forged necklace

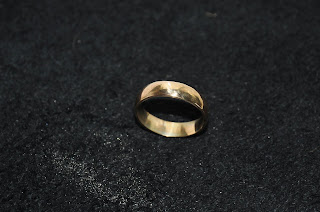
Wedding ring finally finished.....took some doing. It went from too big, to too small, to too big to just right!!! At the point of it being too small, I tried to stretch it on a mandrel, but couldn't get it anywhere near the size it needed to be. In the end I had to saw it open and add a bit of the gold that I had taken out earlier. That meant two joins. To make it smaller (the final time) I had to open just one join, take out a small piece and resolder without melting the solder in the other join. I did it by hiding the join in the heat resistant tweezers which wirked fine. Phew, relieved it fits.

Paul is delighted with it, didn't realise initially that I made it which pleased me very much. He had better not lose this one......

I have made a very pretty hand forged chain which I was going to sell but I love it so much that I am going to keep it.

It took me hours, but it was worth it. I made the chain in the same way I did this one. I then made 3 larger rings from 1.5mm round wire, flattened and hammered them, and joined it all up with jump rings that I soldered closed. I dipped it in liver of sulphur to give it a lovely dark patina, then polished it up again.

I love the look of these hand made chains, but I need to find a quicker way of making them. I could start with soldered 8mm jump rings rather than make my own, but it would make it much more expensive. I also found soldering jump rings once linked to the necklace was fiddly and a bit hit and miss. Need to experiment some more.


Saturday 6 August 2011

A labour of love

Stephanie is my oldest and dearest friend, my soulmate, an artist and  printmaker extraordinaire who has lived on the other side of the world in Melbourne for many years. I have known her since we were five years old and friends do not get more special than this one.

I want to make her a birthday present - she isn't into bling or sparkly, so I decide on a pendant necklace which I will forge, hammer and oxidise.

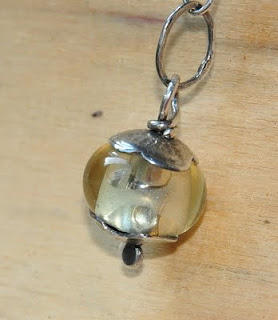
I have in mind a particular bead but I cannot get it locally, and in fact what is in my mind probably doesn't exist. I want a cream rondelle, about 16mm, with a cracked glaze appearance. I find some magnasite beads that are almost right but have left it too late to order from abroad. I settle for a pandora style glass bead instead in a yellowy clear glass from the Southampton beadshop

First I make some links for the chain. I wind some 0.8mm round wire around a tool handle and cut them using pliers into individual links. I solder them closed after filing the ends square. I use too much solder and find it difficult to file it smooth. Still I am learning by my mistakes.


Then I make them slightly oval by pushing them onto my burnisher blade before I flatten and hammer them. It is time consuming and I know I can't make the whole chain like this, so I have bought some silver chain to attach to the hand forged links.

I really struggled to find the right sort of chain sold loose. I wanted something simple, plain oval links, to mimic the shape of the hand forged ones. Had to compromise with some plain chase chain 25/11 from Cooksongold.com.

I join the handforged links with hand made sterling silver jump rings which I had great difficulty soldering. I messed up so many. I had stupidly used extra easy solder on the hand forged links so had to use the same again on the jump rings. I made many mistakes, too much solder, not enough filing to make ends meet before soldering, missing the joints, soldering the jump rings to the other rings, not enough flux............ sheesh! I bought some ready made jump rings and silver solder paste which made the job easier, though I still managed to mess some up. Luckily this is a rusticy piece so I can get away with a certain amount of mistakes.

I make some bead caps using my disc cutter and drill a hole in them using my cougar drill (charity shop purchase). Can't see the finished article in my mind at this point but have to keep going. I ball up the end of some 1.0mm wire to make the clasp and other findings. I hammer the ball of one to flatten it slightly, and with the other I make a clasp using my round nosed pliers. Again, flatten and hammer...

Because the bead has a large hole I need to somehow keep the centre pin in place otherwise the beadcaps will move around. I wrap thin copper wire round and round the pin so it pads out the hole.

Finally I join the pieces together with jump rings which I solder (getting the hang of it now - no filing needed before or after!).

I spend ages sanding and polishing - my nails are broken, my fingertips sore, but its in the name of love, so I put up.

Final step, I dip it in liver of sulpher (pooey) to oxidise it, and then polish it with car polish to bring back some of the silvery shine.


I like it, it's not perfect - but a true labour of love.

I wrap it in handmade paper, with 'Sweep', a glove puppet that she has coveted for years, and that has been up in my loft since forever.


...and in the card I tell her about this blog!

Wedding ring finished

The mandrel arrives, an ebay purchase from jewellers-tools, one of  few items I have bought from them. Good value for money and fast delivery.

Its nice and heavy and does the job. The ring is now round, and I spend ages polishing it until I am happy with it. The join is not invisible but it is good enough for me. I think it may be a little small after all, but will wait until he tries it on before I do any more to it.

Our anniversary is not for a week or so, so I start my next project, a necklace for my best friend Stephanie for her birthday at the end of August......